Photography Guide
Bore Tide Photography Guide
Camera settings, golden-hour timing by season, best angles at each spot — and how to photograph seals surfing the wave
Best shutter
1/800s or faster
Best lens
100–400mm telephoto
Best tides
Large+ (29+ ft range)
Golden hour
Jun: 4–6am · Sep: 7–9am
The Turnagain Arm bore tide is one of the most photogenic natural phenomena in Alaska — brown silty water against snow-capped peaks, a wave moving faster than you expect, harbor seals riding its crest. Getting the shot requires knowing when to go (tidal range matters more than date), which spot gives the angle you want, and the right camera settings for fast-moving water. This guide covers all of it.
Featured partner
Advertise to bore tide visitors
This spot reaches people actively planning a bore tide trip to Turnagain Arm. Perfect for surf schools, wetsuit rental, Girdwood lodging, guided tours, or gear shops.
Inquire → [email protected]Shutter speed — the most important setting
The bore moves at 10–15 mph and its leading edge is actively breaking. You need at least 1/500s to freeze the wave crest; 1/800–1/1000s is better for turbulent whitewater or a seal mid-action. Use shutter priority mode (Tv or S), set 1/800s as a starting point, and let the camera adjust ISO automatically. Modern sensors handle ISO 1600–3200 cleanly in daylight. In overcast or low-light conditions, drop to 1/500s and accept slight motion blur in the wave top for a more dramatic effect.
Only shoot Large and Good bores
A Small bore (tidal range 23–27 ft) produces a modest wave that looks underwhelming in photos. Large (29+ ft) and Good (27–29 ft) bores produce the wall of water that fills a frame with impact. Check our live schedule before committing to a trip — the tidal range is known days in advance. Two to four Large-rated events occur most months during the summer season. Planning around a Large bore instead of a random day is the single biggest thing you can do to improve your shots.
Lens choice by shooting style
A 100–400mm telephoto (or 150–600mm) is the standard bore tide lens — it lets you fill the frame with the wave face from a highway pullout without entering the water. A 70–200mm f/2.8 works well at Hope/Mile 13, where you can get within 100 yards of the wave on the south shore gravel bar. A 14–35mm wide-angle captures the full arm with mountain backdrop — best from Beluga Point or Girdwood for environmental context. If you can bring only one lens, the 100–400mm range gives you the most versatile bore coverage.
Golden hour timing by season
Bore tides run twice daily on a tidal calendar that shifts roughly 50 minutes each day — they don't care about sunrise. But when a bore coincides with golden hour, the low-angle light on brown silty water against snow-streaked peaks is extraordinary. June–July: sunrise is 4–5am AKDT; early morning bores in summer sometimes hit golden hour but require an early alarm. September–October: sunrise is 7–9am, making golden-hour bore alignment much more common at reasonable hours. Check our schedule against Anchorage sunrise times (timeanddate.com/sun/us/anchorage) and plan accordingly.
Best locations by shooting style
Hope/Mile 13 (south shore): get within 100 yards of the wave on a gravel bar — intimate, close-up wave-face shots and the only spot to capture seals eye-level with the bore. Bird Point (MP 96): elevated overlook with Kenai Mountains backdrop across the water — wide environmental shots and the best pullout infrastructure. Girdwood Flats (MP 90): pullouts #4 and #5 are the traditional locations, multiple angles, bore is tallest and most compressed here. Beluga Point (MP 110): widest arm view, bore is lower but the distance across the water adds scale.
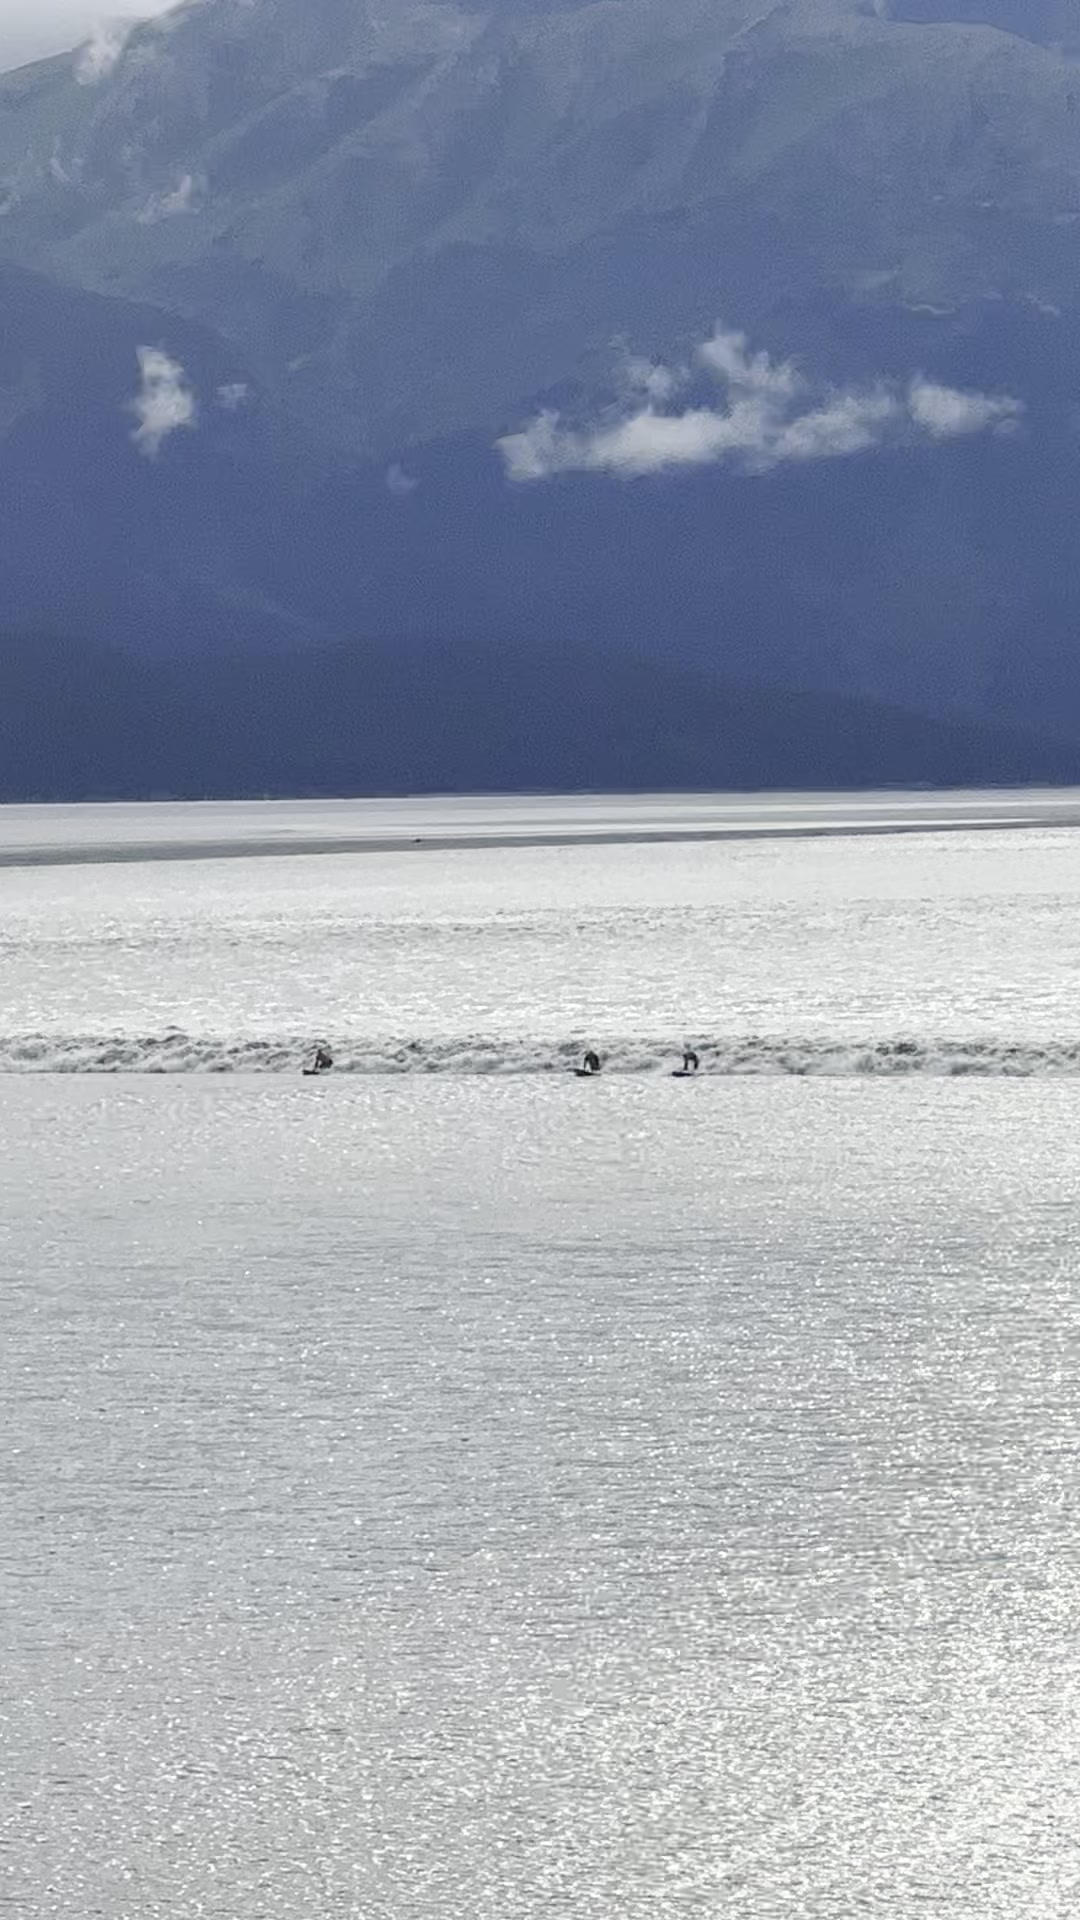
Photographing seals on the bore
Harbor seals surfing the bore are the most unusual wildlife-action shot available on Turnagain Arm. Position at Girdwood Flats or Hope/Mile 13 and scan the water surface 5–10 minutes before the bore's predicted arrival — seals are often visible as dark round heads. Once the bore arrives, track the wave crest for seal heads and fins above the foam line. You need 400mm or more to isolate a seal from the highway pullout; Hope's closer access at water level works with 200mm. Burst mode (10+ fps) locked on the wave crest is the technique.
RAW, white balance, and post-processing
Shoot RAW. The glacial silt gives bore tide water a warm amber-brown tone that reads as orange in auto white balance — either embrace it for warmth or set a custom WB to cool the water toward brown-grey for a more natural look. In post, the orange/yellow channel is where the silt lives; pulling it slightly cooler produces a more accurate silty-water color. The Chugach snow and rock in the background hold detail well against the warm water — avoid heavy-handed global desaturation, which kills the color contrast that makes bore tide photos work.
Drone — check airspace and park rules
Drone footage of a bore tide from above is extraordinary — the wave front is clearly visible moving across the arm, and seals on the crest are visible from altitude. The Turnagain Arm corridor is Class E airspace from the surface near Merrill Field; most bore tide pullouts are below 400 feet AGL in uncontrolled airspace, but the Seward Highway corridor runs through Chugach State Park — Alaska State Parks has drone policies that require checking aksportsman.gov before flying. LAANC authorization via Airmap or Aloft covers the airspace requirement where applicable.
Pro tip
The bore is audible 3–5 minutes before it arrives — a low roar that builds like approaching traffic. Use that warning time to lock exposure, switch to burst mode (10+ fps), pre-focus at the distance where the bore will enter your frame, and stop moving. Don't be adjusting settings when the wave hits.
More bore tide guides
Hope / Mile 13
South shore quiet — the best unobstructed bore tide view, 45 min ahead of Girdwood
Bird Point (MP 96)
The best Seward Highway pullout — wide views, parking, and minimal trail to the shore
Beluga Point (MP 110)
Closest to Anchorage — also one of the best spots to see Cook Inlet belugas
Girdwood Flats (MP 90)
The most-watched bore tide location — pullouts #4 and #5, classic Seward Highway vantage
Bore Tide Surfing Safety
What you need to know before you paddle out — gear, training, and the risks most people underestimate
Potter Marsh (MP 115)
Where the bore begins — the closest bore tide viewpoint to Anchorage, paired with world-class boardwalk birding
How Bore Tides Work
The physics behind one of Alaska's most dramatic natural events — and how Turnagain Arm became a world-class tidal bore
Wildlife on the Bore Tide
Harbor seals body-surf it. Beluga whales follow it. Bald eagles feed in its wake. The bore tide brings Turnagain Arm to life.